Comments with WPGraphQL
2023-06-05
We were working with our Astro implementation of WPGraphQL and I mentioned a guide for submitting comments. So this guide assumes you are using Astro as a server-side-renderer, producing efficient, pages and endpoints that will in my case be wired up to an express server. To get going with SSR, you need to modify the dynamic routing we did in the previous guide. I’ll have a guide on how to change that over, as well as links back to the official Astro Docs that guided me through it.
To begin, I would first create a new javascript file that hits your WPGraphQL endpoint directly, but I will show how to use an Astro endpoint to obfuscate the API, keeping your comments safer from people using their queries to break your app or flood spam.
I do recommend you experiment with the IDE in the WordPress dashboard, and I have done exactly that with a mutation that submits a comment.
`mutation CREATE_COMMENT {
           createComment(input: {
             commentOn: ${postId},
             content: "${comment}",
             author: "${name}",
             authorEmail: "${email}"
           }) {
             success
           }
         }`
This mutation begins by accepting input that we pass as variables extracted from the form data (more on that in the next block). Then, if the submission and connection are successful, returns a boolean in the message.data.createComment.success portion of the return object.
Alright, so assuming your original query returns the postID, you will need to pass that into a function call that’s triggered with your form submission. I tend to use vanilla JS for explanations, so if you know the fundamentals, you will be able to adapt to whatever framework you are working with. One other thing to note is that the required field for this mutation is dependent on the comment settings for your WordPress installation.
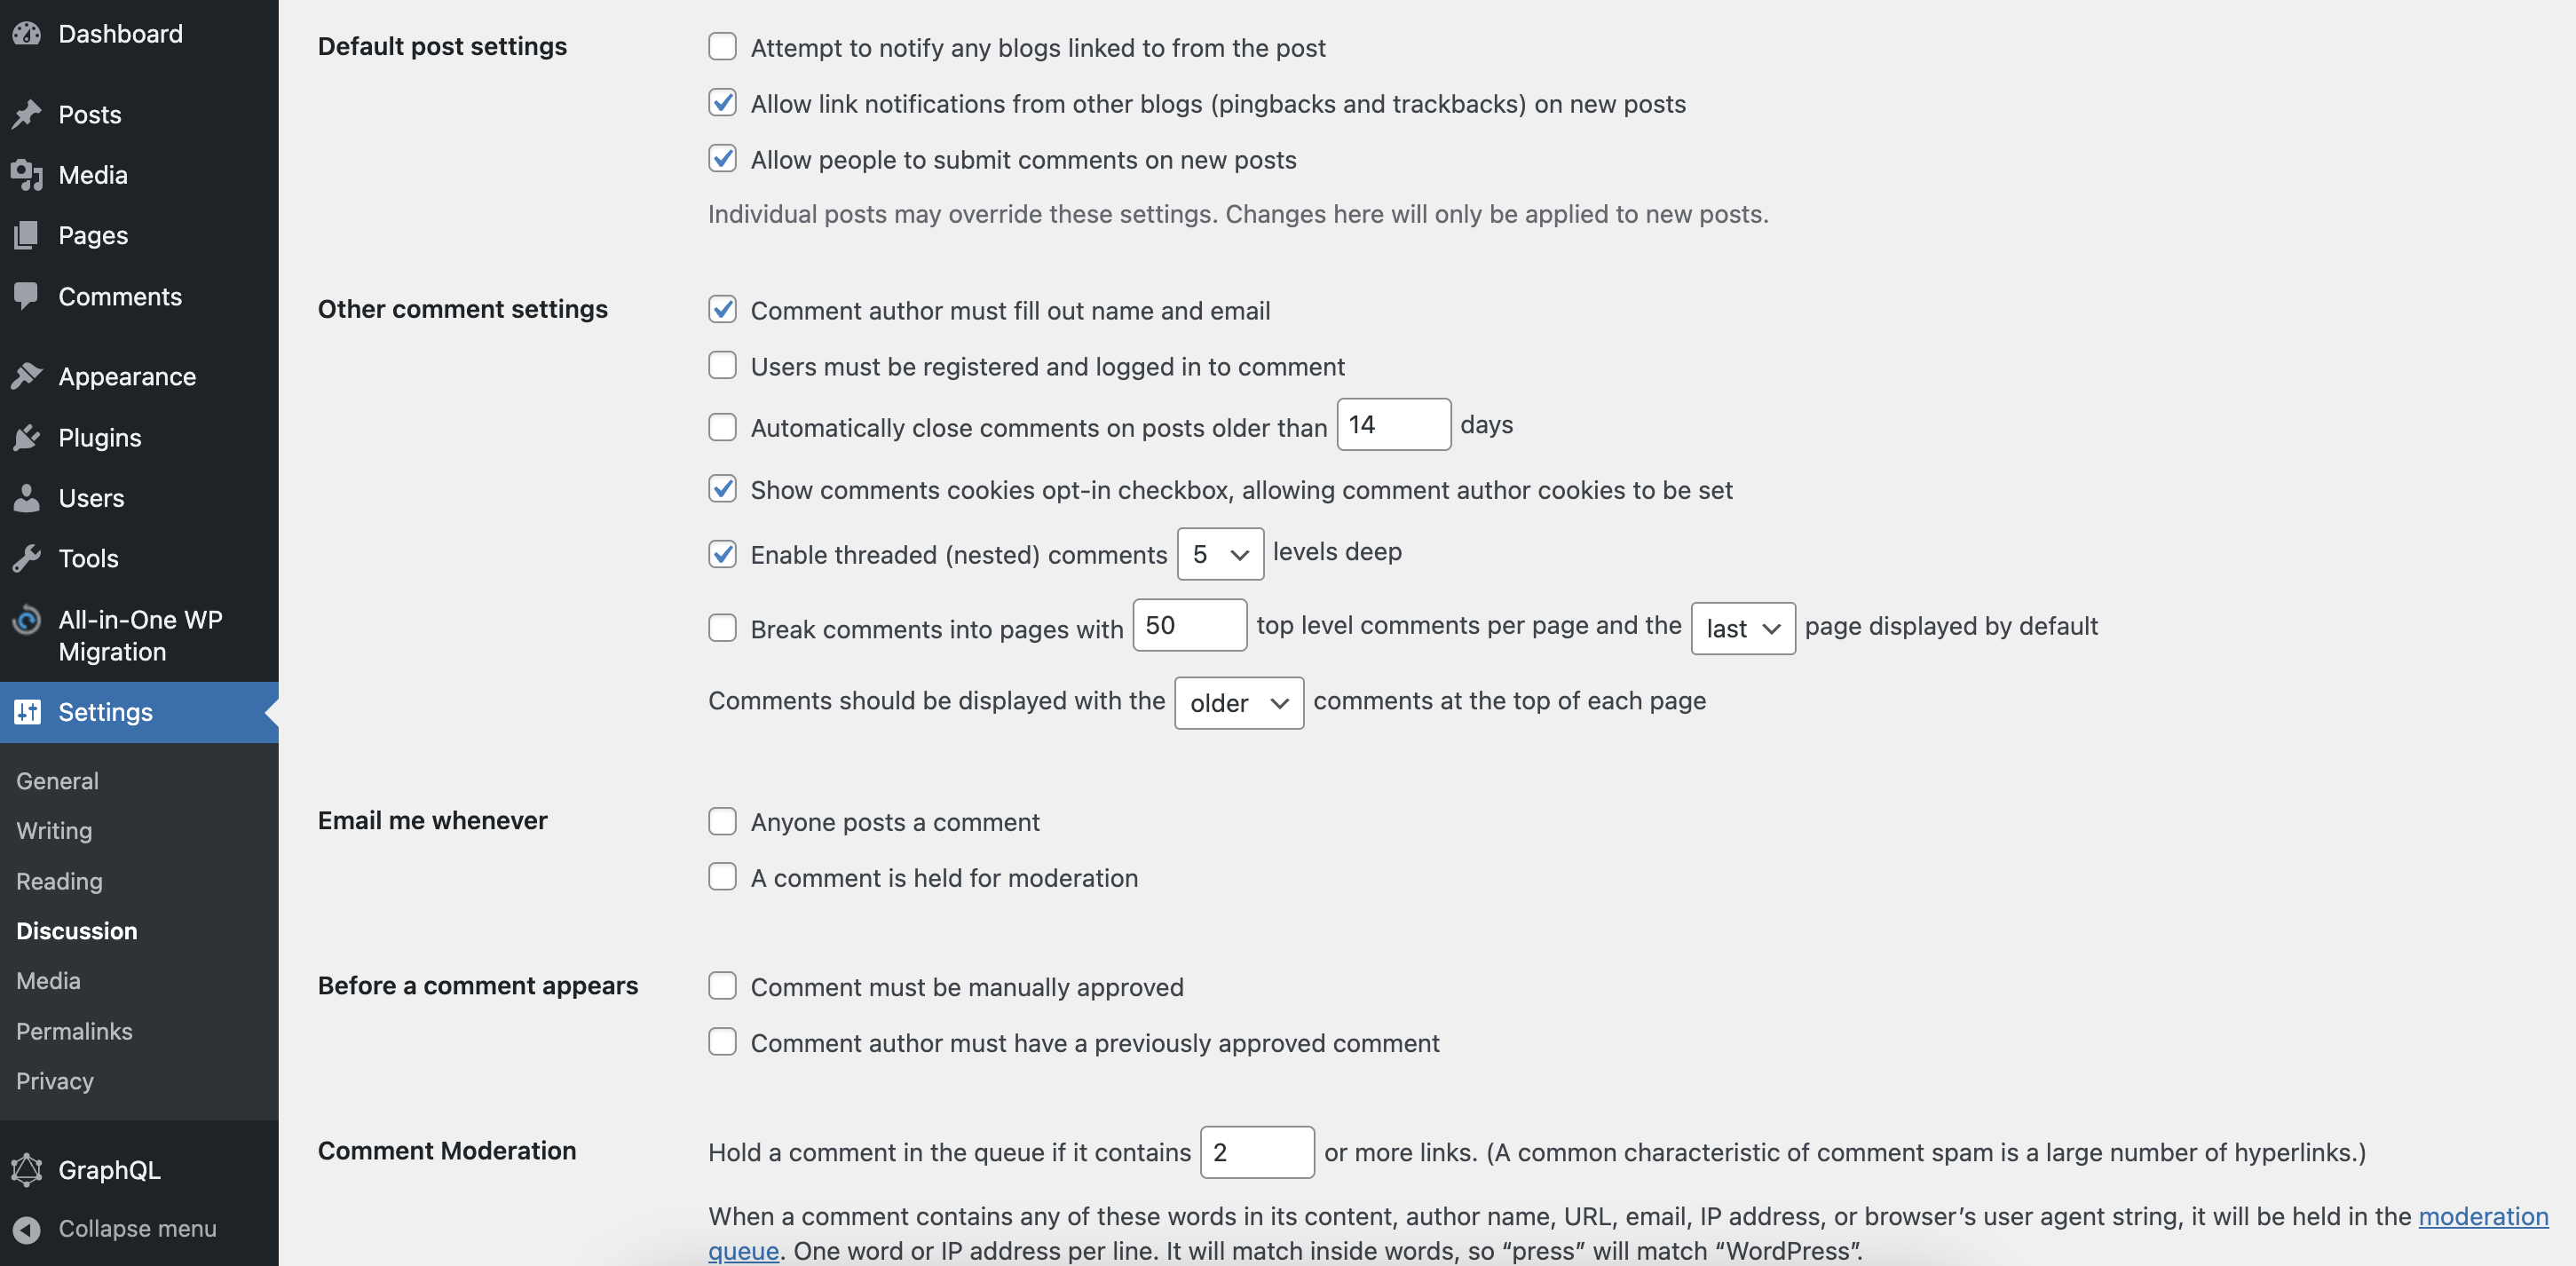
In the discussion tab of the dashboard settings, you will find a number of commenting settings that you might be familiar with anyway if you have managed a WordPress site before. Some key settings to note are allowing comments for anyone, even if they aren’t logged in, and requiring an email and name, which not only curbs spam, but becomes necessary when rendering avatars in the comments with the query from your initial setup.
Make sure you read this part of the documentation and make the necessary changes to your astro config file before doing the next steps. https://docs.astro.build/en/guides/server-side-rendering/#enabling-ssr-in-your-project
I’m assuming you already have your dotenv set up for the URL to your WordPress GraphQL endpoint. If not just use npm to install the dotenv package, create a file named “.env” and write it in it “wp_url=http://example.com/graphql” where example.com is your WordPress site. In the script, you write to handle your comment’s form data, either in an inline script tag or a linked one with the inline tag so that Astro knows to leave it for the user to execute, there are a few steps to get things going. First, reference all your form values, so you can structure them into an object to send to your backend. Once that is structured and serialized into JSON, you await the response, log errors, and reload the page on success.
    async  function commentITs(fun){
      let commentNum = document.forms[fun].name;
      let cName = document.forms[fun].names.value;
      let cComment = document.forms[fun].comment.value;
      let cEmail = document.forms[fun].email.value;
      if(cName == ''||cComment == ''){alert('You must enter an author name, comment body, and valid e-mail to post comment!'); return;}

    let query = {name: cName, comment: cComment, postId: commentNum, email: cEmail}
        const headers = { 'Content-Type': 'application/json' };
        const res = await fetch('/comment.json', {
        method: 'POST',
        headers,
        body: JSON.stringify(query )
      });
      const json = await res.json();
      if (json.errors) {
        console.log(json.errors);
        throw new Error('Failed to fetch API');
      }
      else if(Array.isArray(json.message)){
        console.log(json.message[0].message);
      }
    console.log(json.message.data.createComment.success);
     return location.reload();
      }
Now, we focus on the backend code. You could do these endpoints separately in your SSR integration, but Astro allows you to create endpoints with the filename structured like this name.responseFormat.js so as you probably figured out our endpoint is going to be called comment.json.js This code utilizes the environment variable to make the actual call to the WordPress GraphQL endpoint. You could get very in-depth at this step sanitizing data or hooking up with any other service relevant to the commenting system, but my example just shuffles the passed form data off and returns the errors or results back to the client-side script.
export const post = async ( {request}) =>{
    let gab = process.env.wp_url;
    if (request.headers.get("Content-Type") === "application/json") {
        const body = await request.json();
        const name = body.name;
        const postId = body.postId;
        const comment = body.comment;
        const email = body.email;
        let query = `mutation CREATE_COMMENT {
            createComment(input: {
              commentOn: ${postId},
              content: "${comment}",
              author: "${name}",
              authorEmail: "${email}"
            }) {
              success
              comment {
                id
                content
                author {
                  node {
                    name
                  }
                }
              }
            }
          }`
          const headers = { 'Content-Type': 'application/json' };
          const res = await fetch(gab, {
          method: 'POST',
          headers,
          body: JSON.stringify({query} )
        });
        const json = await res.json();
        if (json.errors) {
          //console.log(json.errors);
          return new Response(JSON.stringify({
            message: json.errors
          }), {
            status: 200
          })
          throw new Error('Failed to fetch API');
        }
        else if(json){
            return new Response(JSON.stringify({
                message: json
              }), {
                status: 200
              })
        }

      return new Response(null, { status: 400 });
    }
}
You might be interested in how to display the comments of a post, so I will walk through some of my steps for basic comment rendering. I don’t support multi-level commenting or even a lot of what can be found in the WPGraphQL data tree. However, it gives you an idea of how to loop through the comments on a post and display them on your dynamic routing page. Your API call to get all the post’s data should look like this.
`{
      post(id: ${id}, idType: DATABASE_ID) {
        content
        date
        slug
        title
        postId
        comments {
          nodes {
            author {
              node {
                name
                avatar {
                  url
                }
              }
            }
            content
            date
          }
        }
      }
    }
    `
And the code for generating the HTML for the post and comments might look like this.
let main = '<h2>'+post.title+'</h2><p>'+post.date+'<p>'+post.content+'</p>';
let comments = '<p style="text-align: center;">Comments</p>';

main = main+comments;
if(post.comments.nodes !== undefined)
{post.comments.nodes.forEach(com =>{
                  let sslArray = com.author.node.avatar.url.split(":");
                  let sslUpgrade = "https:"+sslArray[1];
                  let comms = '<hr><p>'+com.content+'</p><p class="author">--'+com.author.node.name+'<image class="avatar" alt="profile picture" src ="'+sslUpgrade+'"/></p>';
                  main = main + comms;
                });

}
I know there are a lot of moving pieces here, but I think this setup could create a lot of use for creating accessible, bespoke, performant front-end design that is at the same time a very easy-to-use back-end for a customer to create content on. The next topic is search, which is also a basically free feature we can use with WPGraphQL.
Comments